October 24, 2012

Planting Susanville Garlic

It's garlic planting time in Davis! October is the month to get your garlic in the ground around here, and now that the first rains have come, you can take advantage of the softer soil and plant your cloves with ease. Actually, around here you can plant garlic anytime between now and February, but I'm guessing you'll get larger cloves the longer the seed clove is in the ground developing roots prior to new leaves emerging.

"Susanville" seed garlic

I start with high-quality garlic from my favorite seed house, Territorial Seed, and usually plant one softneck variety (more cloves, good for braiding, milder flavor and great for storage) and one hardneck variety (fewer cloves form a single circle around a woody stem; wider range and quality of flavors, but slightly shorter storage time). In the past I've had success with the softneck Susanville, which is a variation on California Early, and the hardneck Duganski. Of course you can get your garlic anywhere, but last year when I tried a cheaper source I had problems. Maybe I would have had problems anyway, but this year I'm going back to my old standby source.

Planting a garlic clove

Clove ready for about 2 inches of soil to go back over it

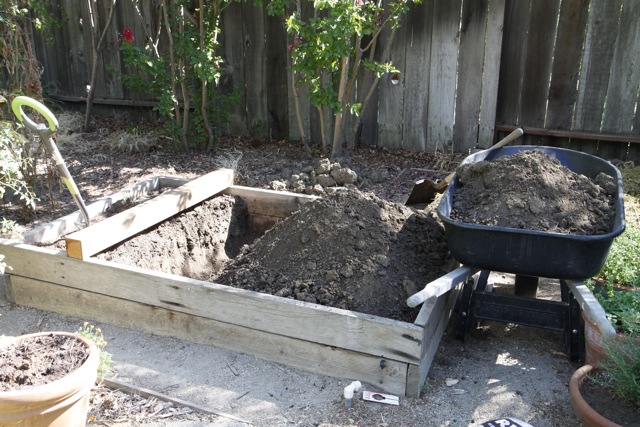
Garlic likes loose and relatively fast-draining soil with plenty of nutrients (what doesn't??) and I've had good luck growing mine in raised beds. Pull apart the cloves from a bulb of garlic right before you're going to plant them (no peeling necessary), and plant in rows 12-18 inches apart, cloves placed about 4-6 inches apart. Plant them with the tip up and cover with about 1-2 inches of soil.

Once all the cloves are tucked into the soil, cover the bed with a layer of straw to protect the soil and keep the cloves cozy. You don't need to worry about smothering the garlic--it will emerge just fine in the early spring right through the layers of straw--but you can help by pulling apart the straw a bit as you lay it down.

Putting straw on the finished bed

Pulling apart the straw

Because neat, tight dry layers of straw fly like frisbees right off raised beds during windy weather, I also lay a few pieces of wood across the finished beds when the straw is fresh. Experience has taught me that, until the rains come in earnest and weigh down the straw a bit more, the wood will keep it from disappearing during a windstorm and save me the work of collecting it off the paths and re-covering the beds.

Protecting the straw from windy weather

Garlic is relatively easy to grow, but if you want more information, I'd recommend the book Growing Great Garlic, by Ron Engeland. Unless you're really into garlic, it has more information than you'll need (a history of garlic, for example), but it also has very practical information about timing of late season watering and harvest, whether and why to remove garlic scapes, problems you may encounter and what to do about them, etc.

Hopefully come next summer, you'll end up with a basket-o-garlic like this!

October 12, 2012

Got it Covered

After adding a few new raised beds this spring, we're up to about 20 or 25 distinct food planting areas on the homestead and I'm looking at all of them thinking there is no way I have the energy to fill them all with winter or early spring crops. What to do with the areas that won't be in vegetable production over the next few months? I have two choices as I see it. I can amend the soil, cover the beds with thick layer of straw, and just let them rest until March. Cozying up with a soft, thick blanket sounds kind of nice to me right now!

The other choice is to seed the otherwise dormant extra beds with a cover crop, something I've never tried until this fall. Cover crops--also referred to as green manure--reduce soil erosion during the rainy season by keeping bare soil covered with a carpet of green. Most also fix nitrogen in the soil, and my soil always needs more of that. If you cut and turn them under (usually right before they flower), all that nitrogen and green matter goes right into the ground to increase the levels of nutrients and organic matter in the soil. Many cover crops also attract beneficials to the garden. All in all, sounds like a great option.

Cover crop in a raised bed

While I have already covered a few of my beds with straw this fall, I also decided to try cover cropping some beds with Crimson Clover, which is winter hardy and can be planted in the fall around here. (Crimson Clover does have red flowers, but is NOT the same as Red Clover, which spreads by runner.) I bought a 1 lb bag from Territorial Seed Co. along with my seed garlic, but there are lots of options online and you can probably find some at either Higby's in Dixon, one of the other area feed stores, or maybe even Davis Lumber, Redwood Barn or other local nurseries. If you want to try something other than Crimson Clover, use the comparison chart (PDF) on Johnny's Selected Seeds website to learn about the benefits of other types of cover crops.

Germination was slightly erratic without rain

One thing I've learned about planting Crimson Clover in our area is that germination requires very moist soil, and of course we don't have that yet unless we are using hose water. The crop in the photo above was planted about 5 weeks ago, and since we haven't had any rain, I've had to water that bed regularly to get all the clover to sprout. Next time, I'll wait to spread the seed until right before there's rain in the forecast. That way, no hose water is wasted where rain could do the job instead. It will be a bit of an experiment (what isn't in the garden??), but I think October-planted clover will do just fine. Now we just need that rain!

Are you putting your beds to bed for the winter, or are you growing veggies over the cold months?

October 5, 2012

Save a Gallon, Save $4.50

When gas prices jump 20 cents in one day as they did yesterday, and the average price of a gallon of regular unleaded in California hits $4.50, I'm really glad my car looks like this:

Photo courtesy

We've been a one-car family since I stopped working in the classroom 2 1/2 years ago, which means Mr. English gets the car (except on the days he bikes home from Vacaville), and my primary mode of transportation is a Specialized Globe Haul bike. I absolutely love this bike, and in general love relying on a bike to get around town. It's easy when you live in Davis, where it's flat as a pancake except for the freeway and train track overcrossings.

There are two major benefits to using a bike instead of a car every day: getting more exercise, and spending less money. Even if you leave gas out of the equation, it's expensive to buy and own a car. When you consider the cost of a car payment, gas, insurance, parking, and maintenance/repair, I figure we save at least $400 per month by not having a second car. Four hundred bucks times 28 months of not owning a car means I've saved over $11,000. That's huge, and is one reason I can afford to work here on the homestead rather than full-time outside the home. The cost of the bike (plus accessories such as paniers, a front basket and rain pants) wasn't much more than one month's worth of car expenses, and Mr. English does the maintenance himself.

The other big, obvious benefit to having a bike instead of a car is increased physical fitness. When there's a car in the driveway, it's easy to get lazy and choose to drive the 8 mile roundtrip to the dentist. No car in the driveway means I had no choice earlier this week when it was time for my appointment, and I took care of my teeth and my body at the same time.

Even though I already know how much better bike riding is for my health and pocketbook (not to mention the environment), I've found I'm even more motivated to ride when I track my miles and money saved, and there's a great way to do that at the Save-a-Gallon website. The site was created by a couple of Davis guys in 2008 as a way to find out exactly how much of a difference they were making by regularly riding their bikes instead of driving a car.


You can create a Save-a-Gallon account for free and then use it to log your cycling miles. If you enter the current price of gasoline, Save-a-Gallon will tell you how much money you save each time you ride. For example, I know that I saved $1.27 in gas costs by riding to the dentist office instead of taking the gas guzzler, and another $0.75 riding Charlie to his clay class. If you are really dedicated about logging your miles, as time goes by you'll get all kinds of great data about your cycling habits and savings. For example, the graphic below gives me a quick visual on how many miles I logged all total in 2010 and 2011, and how the fall months compared in those two years. The more consistent you are about logging (and I wasn't great, actually), the more helpful the graphs and statistics are.


The weather we're having right now is absolutely perfect for riding your bike. Why not commit to replacing some (or some more) of your regular car trips this month with cycling or walking instead? It'll feel great, I promise!

October 3, 2012

A Tale of Two Cabbages

Cabbage #1, protected from the miserable cabbage butterfly with an upside down soil sifter, and therefore lovely and unblemished:

Beautiful, blemish-free cabbage plant

Cabbage #2, not protected and therefore partially devoured by the miserable cabbage butterfly's offspring:

Cabbage that provided lunch for the caterpillars

As you can see, my method of hand-picking cabbage butterfly caterpillars off my cole crops and swiping eggs off the leaves doesn't work so well when I take a day or two off from the hunt. I did finally get one of the offending butterflies to stop moving for more than a split second, though, so I have some nice closeups for you.

Cabbage butterfly (Pieris rapae)

Cabbage butterfly on a squash plant

I am on my way to outsmarting these little devils, though. Last month, Mr. English made me a frame wrapped with floating row cover material that fits perfectly over my seeding trays. That will at least prevent the butterflies from accessing my seedlings. 

Floating row cover frame fits over seedling trays

The next step will be outfitting a couple of our 4 x 8 foot raised beds with PVC hoops, so I can clip floating row cover over an entire bed. This year, I made the mistake of planting the broccoli and cabbage in a triangular bed, which is not a good shape for making a row cover frame. I tried draping the row cover directly over the plants, but that didn't work well. I had apparently missed a few eggs before I draped the transplants; the eggs hatched, and since I couldn't easily monitor the plants under the row cover, the caterpillars munched away quite a bit before I lifted the fabric and discovered the damage. Grrrrr! Next year my transplants will go directly from a protected seedling flat to a 4 x 8 bed protected with a hoop frame. Maybe this is just a bad year for the cabbage butterfly, but I don't see any other way to successfully grow cole crops around here.

Now that I've honed my cabbage butterfly hunting skills, maybe I can put them to good use and turn this situation to my advantage after all. For over thirty years, Art Shapiro, a biology professor and butterfly expert at UC Davis, has offered a pitcher of beer to the person bringing in the first Cabbage White butterfly of the year in the Davis-Sacramento area. I think he's won the prize himself every year, actually, so the odds are against me, but I will definitely be on the look out come January!

October 1, 2012

Double Digging

"Do you double dig your garden beds?" That's a question I've been asked more than once since I started working full time on the homestead and growing most of the family's vegetables. To be honest, I hadn't even heard the term "double digging" until last year, and I didn't know it involved using a very particular method until I read John Jeavon's book How to Grow More Vegetables...

Practitioners of the French biointensive method swear by double digging as a way of aerating and improving the soil and growing more and better quality vegetables than you ever imagined. But I had also read about local farmers pioneering no-till methods as a way to farm more sustainably, and read a soil food web book that advocated not disturbing the soil at all. So which is it--dig up the soil to a depth of 24 inches, or don't till?

Turns out the answer isn't quite so simple. The process of so-called double digging involves digging and removing only about 12 inches and then loosening (not digging and turning) another 12 inches. Plus, one is supposed to carefully move shovels full of soil from one trench to the next as one is digging, with the goal of disturbing the soil layers as little as possible. That's easier said than done, but there is definitely more to the method than sloppily moving soil around. Ideally, a garden bed will need to be double dug only once or twice and then can be left largely undisturbed, with additions of compost to the top of the bed providing the nutrients needed to maintain the bed in the long run.

A couple of weeks ago I wrote that one of the major lessons learned in my garden this year was that I need to take better care of my soil. After reading more about this particular technique and hearing from people who have used the double digging method with success, I decided to double dig some of my older garden beds once in order to loosen highly compacted soils. After double digging once, I'm going with a long-term plan of improving the soil through compost and green manures, but not more deep digging.

There are lots of books and websites that give more information and specific instructions on how to double dig (just Google the term), but here's what it looked like in one of my raised beds:

About halfway finished

Trench emptied of top 10-12 inches of soil

Loosening bottom 10-12 inches of soil

I moved across the bed digging and loosening one approximately 12-inch wide trench at a time, adding and incorporating soil amendments (homemade compost and purchased "humus") to the bottom of each trench as I went. If you're wondering if this took forever, yes, it took about 2 1/2 hours to do just one bed. Also, I was pretty tired afterwards! Given the amount of effort involved, I've decided to double dig only a few beds this fall and then monitor the results. If it turns out to be worthwhile (i.e. the double dug beds turn out to be super productive and healthy) then I will do more of them next year. Stay tuned for the results!