August 27, 2012

Banyan Café: Eggplant Stacks with Goat Cheese & Balsamic Reduction

Are you one of those people who thinks they don't like eggplant but maybe haven't tried it in a really long time, or have never had it prepared well? Or, maybe you're somebody who has always loved eggplant and seeks out more ways to cook with it? Either way, this super flavorful, eggplant-focused dish is for you!

Eggplant stacks as a side dish

We started growing eggplant a few years back, mostly because I thought I wasn't a fan and wanted to grow it myself to see if my feelings about the veggie might change. They did, but not overnight. If there was any lingering doubt about my taste for eggplant, it was erased the minute this creation hit my mouth.

The title makes this recipe sound way more gourmet and complicated than it is, although the rich flavors and fancy presentation--mine is kind of slapped together, but you could make it prettier if it mattered--do make it restaurant worthy. Best of all, it's a quick recipe that's easy to assemble, made with all the stuff you already have coming out of your ears in the summer garden, and uses the grill rather than the oven on hot summer afternoons. We first served it to friends a week ago and have made it twice since. That's how tasty it is. Hey, even the pre-teen likes it, which is a big bonus!

The recipe comes from Cooking Light magazine (2007), but it's so easy to make I don't even need the specific directions anymore. Start by gathering up enough eggplant, red bell peppers, and zucchini/yellow squash to serve your crowd, picking less if you're making a side dish and more if the dish will serves as a vegetarian entree.

Sliced veggies ready for grilling

Slice the veggies, opening up the peppers so they lay flat for stacking. I like to draw moisture out of my eggplant and zucchini by salting it and letting it sit for 10-30 minutes. Before grilling, pat with a cloth or paper towel to remove the water that has come up to the surface, baste with some olive oil, and season with pepper and salt (unless you already salted the veggies.) Throw these on the grill for about 8-10 minutes, turning once while cooking.

Eggplant stack components on the grill

While those are cooking, put 1/4 cup of any red wine, 1/4 cup of balsamic vinegar, and a tablespoon of brown sugar in a small saucepan on the stove. Bring to a boil on medium high and let the mixture reduce by about half, so that you end up with about 1/4 cup of sauce when you're done. It takes about the same amount of time as the veggies on the grill, and you'll want to monitor the heat as it cooks so you don't burn it.

Ingredients for herbed goat cheese

Finally, grab a sprig each of basil and oregano from the garden (or experiment with other herbs you have on hand), rinse and chop them, and then use a fork to mix them into a pile of goat cheese. I LOVE cheese, so I use about a heaping tablespoon of goat cheese for each serving--use less (or even more!) if you like. This is a great job for kids while you are making the reduction, or take a few minutes to do this part before you start the grill and stove.

To assemble, start your stack with a slice of eggplant and add the rest of the ingredients, alternating zuke, cheese, pepper, and balsamic reduction, ending with another eggplant slice, and topping it off with a drizzle of the sauce over the top. If you're planning to eat a steak alongside this dish, double the amount of balsamic reduction you make and drizzle that on your steak, too. Pour a glass of the red wine you used in the recipe, and enjoy!

August 23, 2012

"Comforter Compost" Method

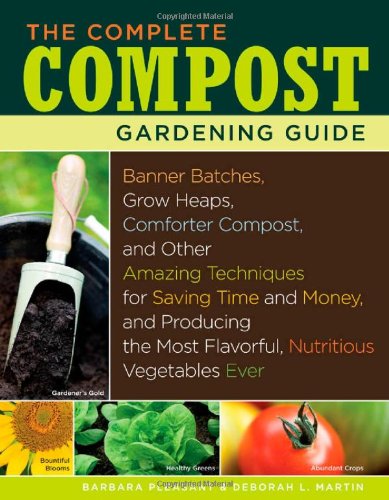
In between getting the kids ready for the first day of school and harvesting and processing garden produce this week, I've been reading a great book on compost. We have lots of different composting projects going on throughout the yard and have been making compost for years, so I wasn't sure how much I was going to learn from a big book about compost, but I enjoyed Barbara Pleasant & Deborah L. Martin's The Complete Compost Gardening Guide. (From Storey Publishing, 2008, and available at the Yolo County library.)

(photo courtesy)

Of course, anybody can compost easily by just tossing garden debris and kitchen scraps in a pile in the backyard and letting the material rot slowly, turning itself into black gold over time. It doesn't have to be complicated. However, if you have more time to spend on your compost projects or want to try some new techniques, you might find something of interest in this book. It's definitely a comprehensive resource and maybe the only one you'd need on compost.

I appreciated the in-depth information about various compost materials (hay, pine needles, cardboard, and odd additions such as dryer lint and fabric) and the chapter on compost gardening techniques. None of the methods are brand new or unique to these authors, but some of them just hadn't occurred to me before reading the book.

For example, the authors strongly encourage readers to build their compost piles directly in the garden, meaning actually on top of a patch of soil where you plan to grow something next season, rather than on the edges of the yard. Most of our compost piles are tucked out of sight and contained in wooden or plastic bins; I hadn't thought to build one right in the garden, but it makes a lot of sense. Some of the best soil in my yard is the stuff that's been building up at the bottom of the compost bins over the years. Why not put that right where I need it in the first place?

Again, this is not a new technique. Some people call it sheet composting, others lasagna gardening; these authors call it "Comforter Compost" and focus on locating it directly in a veggie bed. The method is analogous to laying down a comforter over the top of a bed in your house. It doesn't have to be constantly turned or changed; you just lay it down and it improves the functionality of the existing bed. Comforter Compost doesn't have to begin with a layer of newspapers or cardboard, as sheet composting often does, because the goal is not to smother unwanted plants or grass as you build a new bed, but to improve upon what's already there.

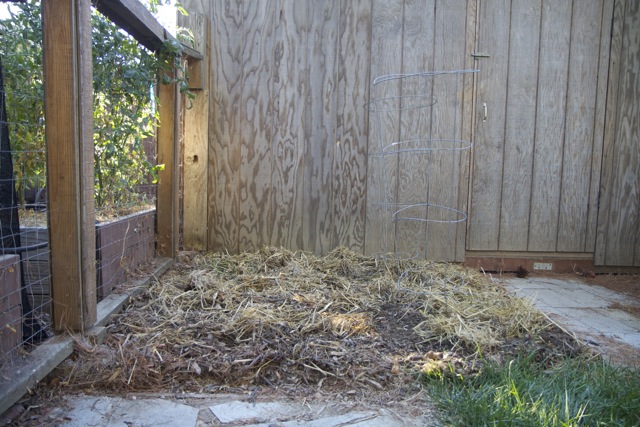
One of the lessons I've learned in the garden this year is that I have to pay waaaaay more attention to maintaining the quality of my soil (more on that later), so I decided to make a Comforter Compost over the bed that held some of my potatoes this spring. This piece of ground had never been improved or amended, and was suitable for the potatoes only because I put them in above-ground containers filled with soil and organic matter from other parts of the yard. Here's what the patch looked like after I dumped out the potato containers:

Bed after dumping out potato container contents

The straw is from the potato towers. I smoothed this straw/soil mix over the space and then added the next layer, which consisted of about an inch of fresh grass clippings from the mower.

Bed with first compost layer of grass clippings

Next came a thick layer of leaves gathered from underneath the Sweet Gum trees. This is basic composting stuff here--mixing of browns and greens. Nothing fancy, just brown, green, brown, green. You might notice that two tomato cages are still stuck in the soil on the right side of the bed. Well, that's because they are in fact stuck. As in, no amount of arm muscle strength (from me, at least) was going to dislodge those from the heavy clay-turned cement base of this bed. That right there tells you all you need to know about the quality of this soil!

Leaf layer

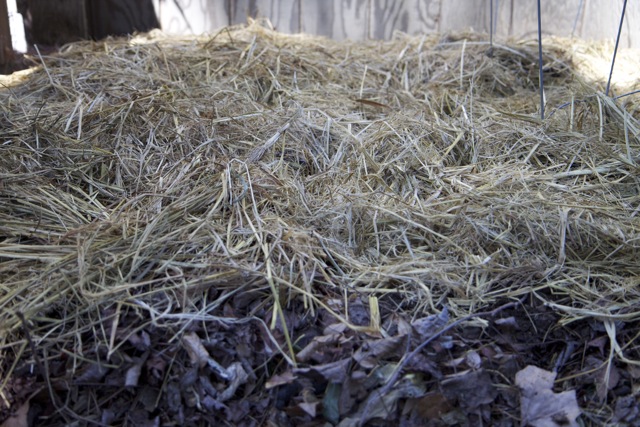
After the leaves came a layer of aged horse manure (a composting "green" because of the nitrogen levels, even though its color is brown), taken from the pile we got from a neighbor's nephew in the spring and stashed away near the chicken coop for future use. Finally, I topped the Comforter Compost with a hay mulch to help keep the moisture in and improve the look of the bed a bit.

Hay tops the comforter compost

Now I'll leave this bed alone until spring, with the possible exception of aerating it here and there if I think of it over the next eight months. By April it should be ready for some winter squash seeds, which I imagine will greatly appreciate what at that point should be a bed topped with rich compost. I'll be sure to let readers know how it goes.

Anyone else ever tried composting directly in a planting area of your garden?

August 15, 2012

Heads Up!: Chinese Elm Summer Limb Drop

The first time we saw our property before buying it, we pulled into the cul-de-sac, walked straight through the 960 sq. ft. home as others chatted with the realtor, and stepped into the backyard. One look at the mature shade trees and the huge blank slate of a yard and we said, "This is the place!" It's been ten years and we've thoroughly enjoyed those beautiful trees, the shade they provide, the leaves they add to the compost pile, and the birds they attract to the homestead.

Unfortunately, large, mature trees also mean lots of mess, lots of maintenance, and the occasional hassle of, and sometimes damage from, a large limb dropping off a tree. This often happens in the middle of a wet, windy, January storm, but other times it happens out of the blue on a still, hot summer afternoon, as it did yesterday.

Chinese Elm branch on top of a tomato patch

There was about half an hour of daylight left yesterday evening when we heard a very loud, fast scraping sound on the roof followed by a huge thunk and vibration of the ground. One look out the bedroom window confirmed what we suspected--a huge branch had dropped off our very tall Chinese elm tree. This is not the first time we've lost a branch from the elm, but it's the first time I can remember this particular tree losing one under these circumstances.

4-5 inch diameter Chinese Elm branch in the patio

There's actually a name for the phenomenon of trees randomly dropping branches on calm, warm days between May and October: it's called summer limb drop (also known as summer branch drop or sudden limb drop). Arborists have all kinds of theories about what causes it, but there isn't consensus.

Many tree people believe it's caused by an uptake of large amounts of water in an attempt to keep the tree hydrated during a heat spell, followed by an inability to get rid of that water quickly enough, causing internal cell failure and then branch breakage. Whatever the cause, it's impossible to predict. Some trees--such as elms, oaks, eucalyptus, and Bradford pears--are more prone to summer limb drop. Our black walnut has unexpectedly shed several big limbs in the summer months over the last ten years, which is always alarming due to its location over the back lawn, garden and play area.

In this case, we called in an arborist to confirm the diagnosis, and the assessment was as expected--our Chinese elm is a lovely, strong tree and we just have to expect the occasional branch to break off this time of year. We were reassured that summer limb drop typically happens with smaller branches, not the very large main branches that could otherwise do serious damage to a house.

Chinese Elm shading the house

Large or extra large branch, we're simply thankful that nobody was hurt yesterday (unless you count the five flattened tomato plants and cages.) The kids play in the yard constantly this time of year, so the idea that it's normal to randomly lose what I consider to be pretty big branches off our backyard trees on a calm summer day is more than a bit scary, but I suppose it's the price we pay to maintain an urban forest.

We've considered removing the tree entirely and replacing it with a slightly smaller variety that's not prone to limb drop, but the elm is a healthy tree that's responsible for a fair amount of energy savings in the summer and it would take years for another tree to grow tall enough to shade the house. What would you do? Live with the chance that another big branch will drop and possibly hurt someone, or take out a mature tree that is providing all kinds of benefits on the homestead?

August 13, 2012

Gimme Shelter: Shading the Basil in a Heat Wave

The basil plants do not like this 100+ heat wave we're having one bit. I've got two beds of basil in the garden and noticed last week that one of them was looking a lot better than the other. That first bed is situated next to our pomegranate tree and therefore gets some nice filtered shade throughout the day. The plants were looking happy, with big, green leaves ready to be picked and turned into pesto.

Basil growing in the shade of a fruit tree

The second bed of basil, however, was looking decidedly unhappy last week. Most plants were flowering--not a big surprise at this time of year in Davis, but I was pinching off way more flowers in the second bed than in the first. Also, the plants were spindly, the leaves were little, and the color wasn't as good as that of the plants in the other bed. Same variety.

What was the difference? Well, I had planted bed #2 about a week later than bed #1, for one thing, so those plants had a week less of growing time before the serious heat hit. More importantly, bed #2 was getting intense afternoon sun at the hottest time of the day. No matter how much water I gave them, the basil was getting zapped by those rays to the point of deciding it was time to move on to seed production.

Spindly basil in bed #2, just after pinching loads of flowers

My family loves its pesto, so in an effort to save basil bed #2, Mr. English and I grabbed a roll of shade cloth that was sitting in the greenhouse, attached it to some leftover 1 x 2 boards, attached those to the bed and--voilá--a shade shelter for the basil.

Shade shelter for the basil bed

It's not pretty, but it's getting the job done. The shade cloth looks pretty dense, maybe 60-70%, so I was a teeny bit concerned it might block too many rays. Not so. The basil looks fantastic a week later. The leaves have broadened, the plants have filled out, and while there are still some flowers showing up, there is nothing like the concentration there was prior to erecting the shelter.

This makes me think that other plants in the garden might also benefit from some shading during these intense heat waves, particularly the peppers, some of which are suffering from sun scald. I'm inspired to make a number of more permanent, but still portable, shade structures. PVC pipe as the frame might work, or to save money and recycle resources I could use up some more of those old 1 x 2s that are sitting around in the "farm junk" area of the yard.

I'm curious if anyone else has constructed temporary shade structures for their beds, or if readers have ideas for what might work. Let's hear 'em, and in the meantime, try to stay cool in today's 103 degree heat!

August 9, 2012

Seed Walk at the Community Gardens

Last month I wrote about seed lending libraries in the Bay Area and Sacramento, and wondered whether anyone in Davis had ever approached our own library about creating such a resource here. Well, they aren't at the library, but it turns out there is in fact a fledgling seed saving group in Davis, called the Davis Seed Savers Alliance. It was started only a few months ago and is headquartered at the Domes on campus.

The group doesn't have an Internet presence yet, (update: they now have an active Wiki page here) but is spreading the word via email, word of mouth, and traditional paper flyer (posted at the Davis Community Gardens and UCD Experimental Gardens). Last Thursday, the alliance hosted a "Seed Walk" at the Community Gardens, which I found out about when a gardening friend forwarded me an email announcement of the event (thanks, Susie!)

Red poppy seed pod

The day was ridiculously hot, but the seed walk started at 7pm just as the sun was going down, so it was actually pleasant out there. Unfortunately, I didn't have my camera with me, so the only pictures you get are post-walk shots of the seeds I collected. (I'll have to profile the Davis Community Gardens themselves soon; driving by the gardens on 5th street they don't look like much of anything if you're not paying close attention, so I had no idea how beautiful the place actually is.)

Larkspur seed

The seed walk started with introductions and a lesson in making a seed saving envelope using plain paper and a particular folding technique. Then we walked out into the garden. The organizers had gotten permission from a number of plot owners to harvest seed from veggies and flowers that had gone to seed, and there was a surprising variety to choose from.

Seeds collected, drying out and sealed in packets

There were lots of veggie seeds available, but since I have most of what I need in that department I focused on flowers. As we wandered the plots, I collected seed from red poppy, Bachelor's button, larkspur, Sweet William (dianthus), and several colors of hollyhock. I also collected some dino kale seeds, and happily accepted a packet of mustard that one of the other participants had collected from her own garden and wanted to share. I brought a stash of the small coin envelopes I use to save seed in my own garden and used those to collect the goods.

Bachelor's button (cornflower) seed

The seeds I came home with were a wonderful gift from the Davis Community Gardens plot owners, but the best parts about the evening were meeting other area gardeners, getting a chance to tour the lovely and diverse Community Gardens, and finding out there's a group of people committed to seed saving and sharing in Davis. The Davis Seed Savers Alliance is starting off with a bang with the goal of hosting weekly workshops on seed collection. There's another one planned for this Sunday, this time on how to save tomato seeds.


Here are the details:

WHAT:  Tomato Seed Saving Workshop

WHEN:  Sunday, August 12, 10:30 a.m.

WHERE:  Experimental College Gardens (on UCD Campus) next to the toolshed in the middle of the garden

WHY:  To teach people how to save tomato seeds using the fermenting method. There will also be an opportunity to see the Davis Seed Savers Alliance seed library and learn how to check out seeds. Appropriate for both beginning and advanced gardeners.

COST: Free

Questions should be directed to the Davis Seed Savers Alliance through their email at davisseedsavers@gmail.com.

Happy seed collecting!